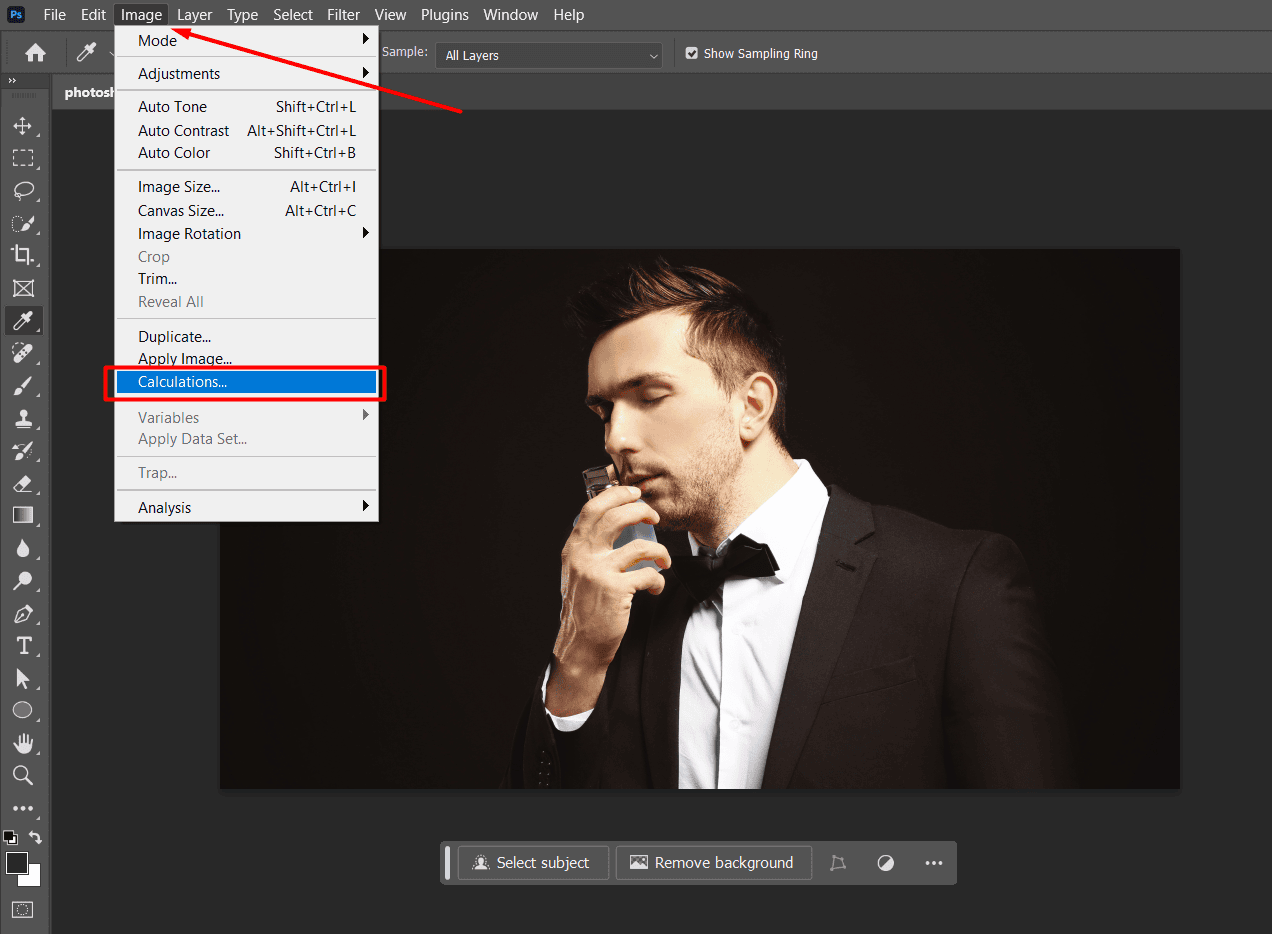
We start by launching our image in Photoshop. Next we go to the “Image” tab. Choose “Calculations.” This handy tool promptly provides us with a grayscale rendition of our image, for editing. Isn’t that pretty neat?
Lets have some fun now. Deciding on a blend mode to add drama to our white picture. In this case we’ll opt for the “Overlay” blend mode. This option brings out depth and contrast giving our image that extra touch of excitement. We can adjust the channels to perfect our effect. We have two source channels, at our disposal. For the one lets select “Green ” and for the one lets go with “Blue.” Trying out channel combinations helps us discover what works best for our image.
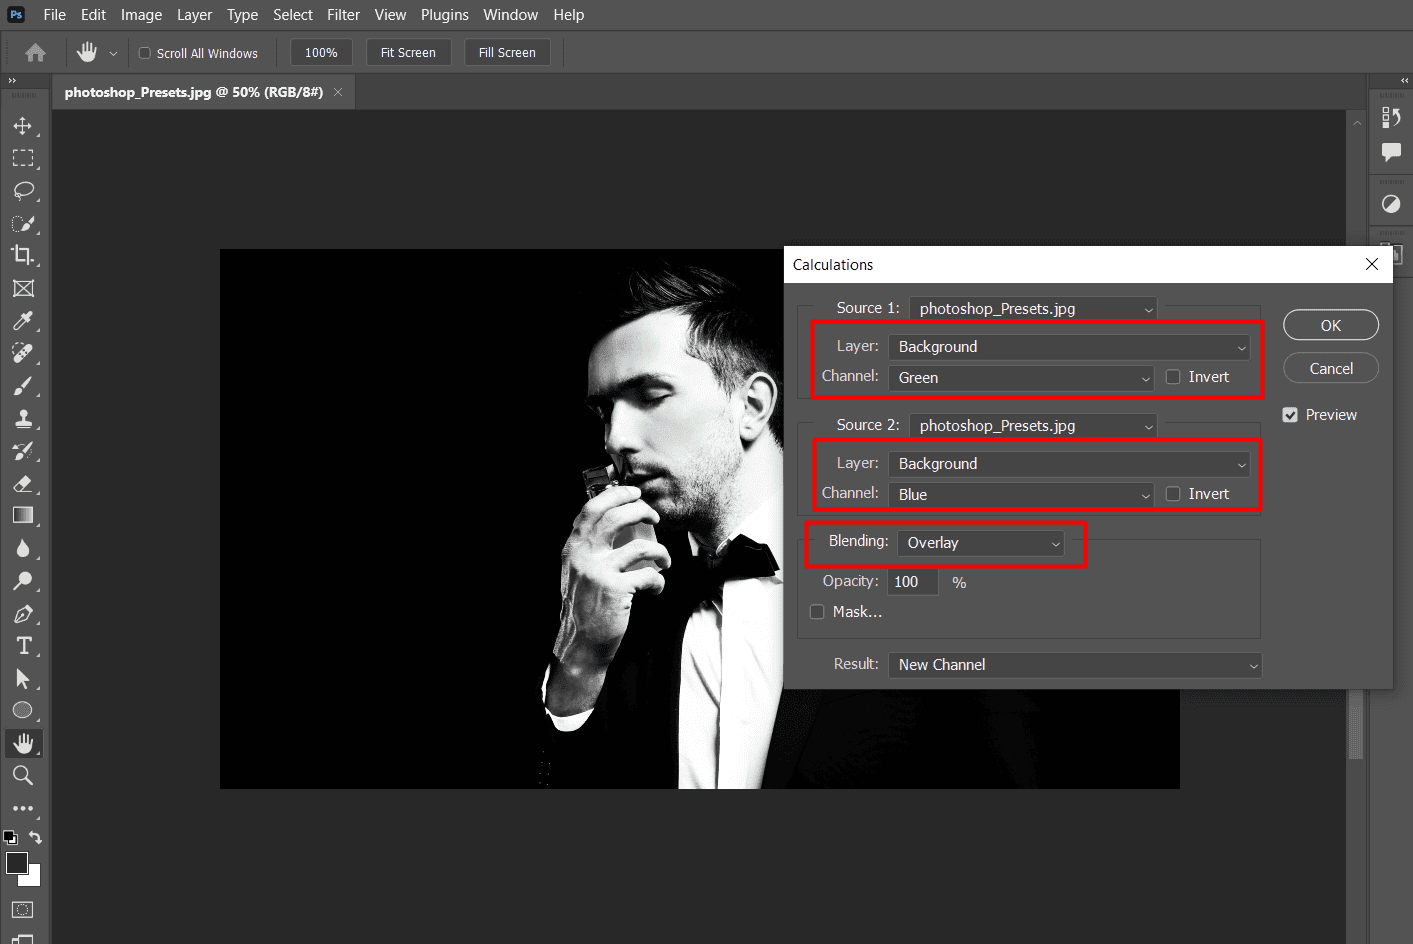
To adjust the intensity you can tweak the opacity level. Maintaining it at 100% guarantees a level of drama. Additionally ensure that the outcome is selected as “New Channel” before pressing OK.

Now go to the Channels panel. There you have it! A fresh Alpha channel has been made. Click on it then hit Ctrl/Command A to choose everything and then Ctrl/Command + C to copy.

In the Layers panel make a layer and paste (Ctrl/Command + V) the copied white image, on top. Now our striking black and white version is all set to stand out!

To give our image a flair we could incorporate a Curves Adjustment Layer. This feature lets us adjust the contrast and brightness to enhance the appeal of our picture.


Here you go. That’s how you can easily make striking white pictures using Photoshop. By making an adjustments, with a couple of clicks you can transform regular photos into captivating pieces of art. Enjoy exploring and expressing your creativity!