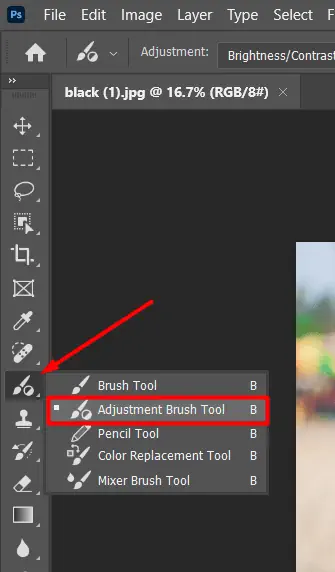
To start using the Adjustment Brush Tool you need to open it in Photoshop’s beta version. For those, on trying it out you’ll have to go to the Creative Cloud desktop app choose beta apps and install Photoshop beta. After installation you can locate the Adjustment Brush Tool within the brush tool group all set for editing purposes.

The Adjustment Brush Tool is really handy for making exposure adjustments in a way. You can pick exposure as the adjustment you want to make. Simply paint over the areas of the image you want to adjust. This creates a layer for exposure adjustments along, with a mask making it quick and easy to tune the exposure levels without going through steps.

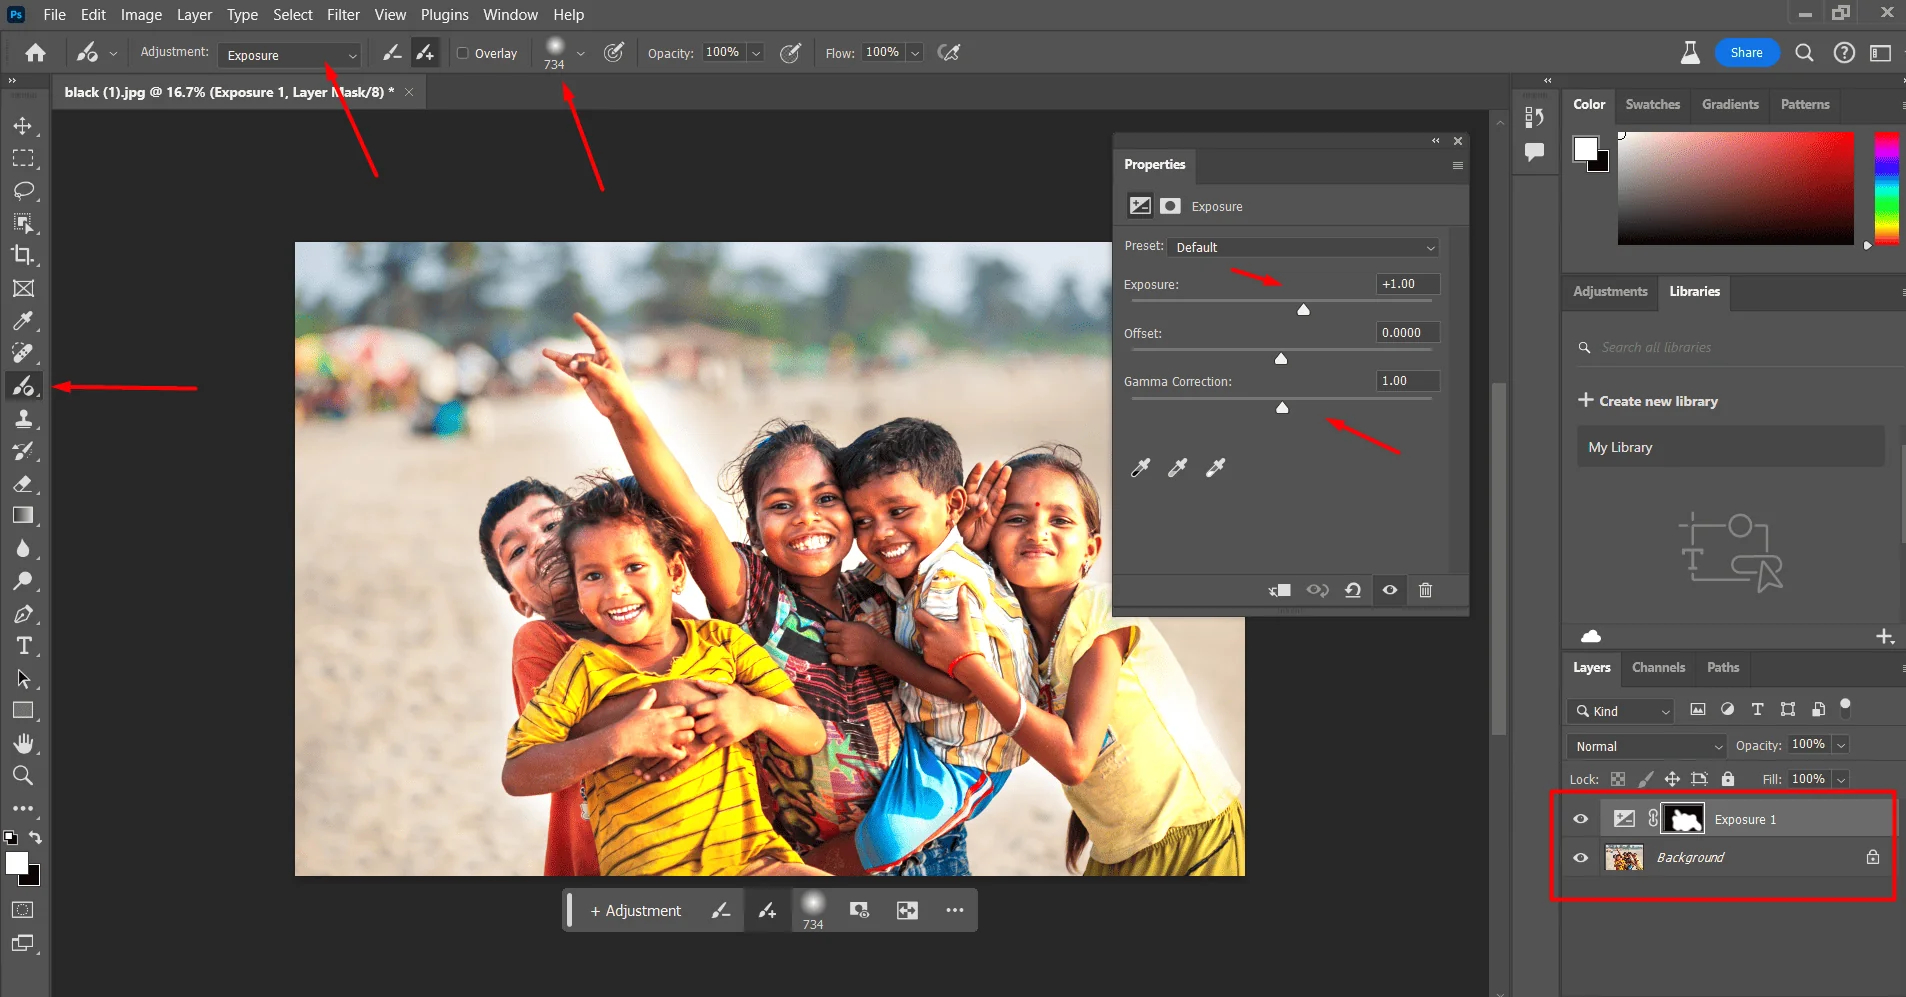

The Adjustment Brush Tool goes beyond exposure adjustments providing control over brightness and contrast changes. Users have the flexibility to switch between applying or removing adjustments, with a click enabling them to make edits for achieving the intended visual effect. Moreover functions such as overlay mode improve clarity during painting making it easier to make adjustments in complex areas such, as skies or landscapes.


The Adjustment Brush Tool stands out when it comes to tweaking colors. It offers a way to change hues remove color from parts or add selective color effects. With this tool users can precisely adjust colors to maintain the images composition.


The Adjustment Brush Tool has some benefits in terms of making editing simpler but its important to keep in mind its limitations. For example the tool doesn’t currently have adjustments, like curves that’re crucial for advanced editing methods. Additionally how useful the tool is can differ based on how each person works, as some users might prefer approaches like using selections along with adjustment layers, for precision.
In summary the Adjustment Brush Tool is a tool, in Photoshop that can be especially helpful, for users looking to make adjustments efficiently. Its usefulness may vary depending on the situation so users should consider how it fits into their workflow. As Adobe listens to user input and improves the tool over time we can expect it to become more versatile and powerful in versions.