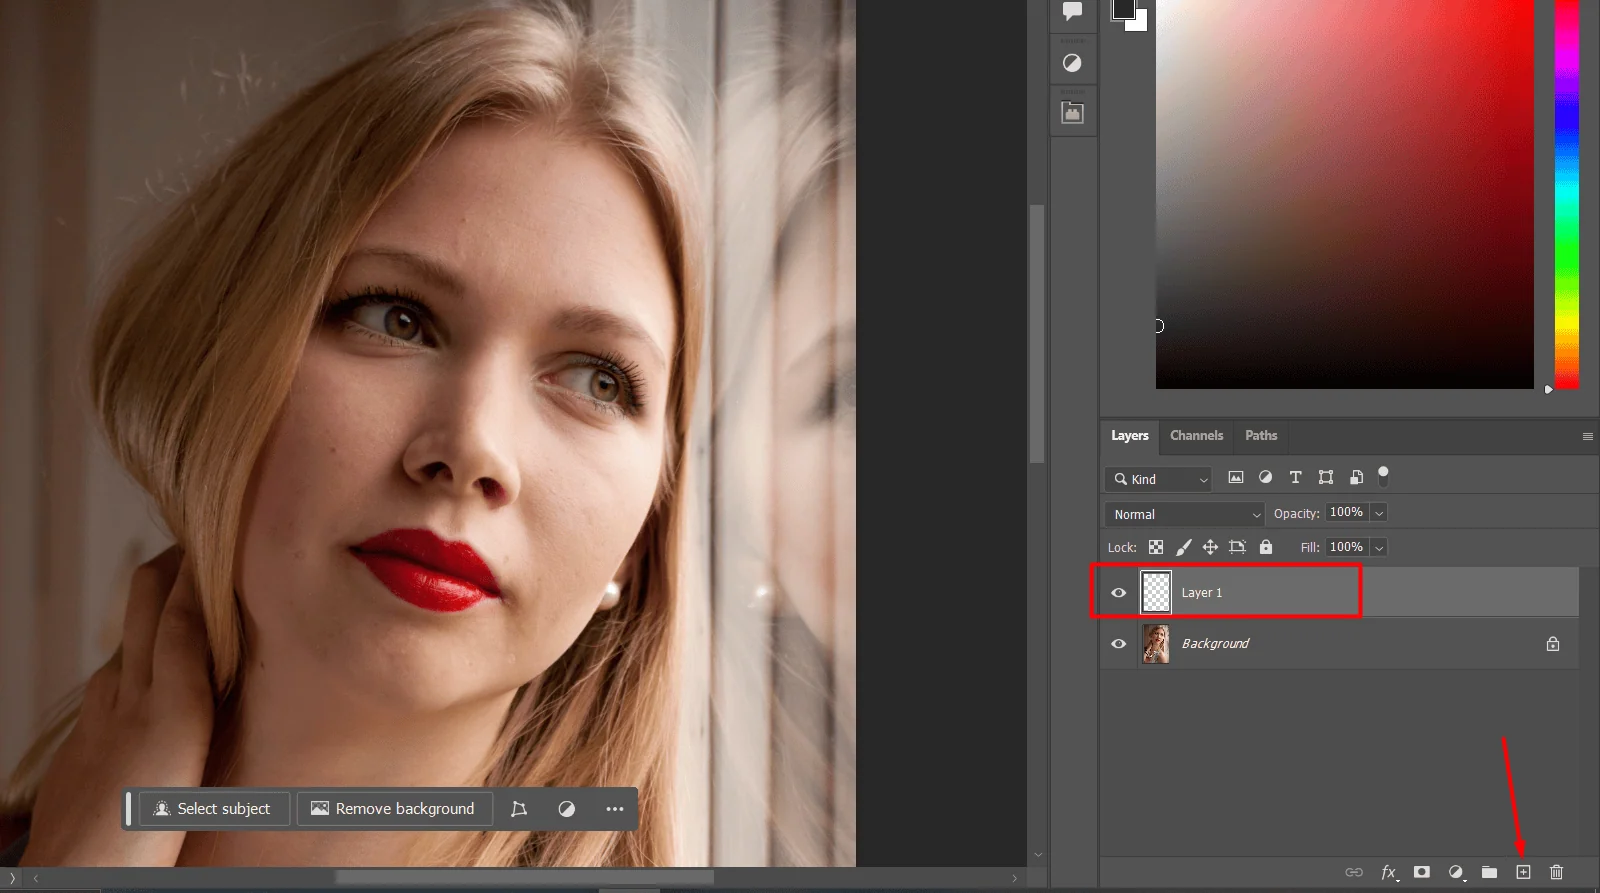
One effective method is utilizing the Remove Tool, within Photoshop. This feature is quite revolutionary as it not aids in eliminating imperfections but addresses minor inconsistencies. Here’s a breakdown of its functionality –
1. Create a New Layer – Start by creating a new layer in Photoshop.
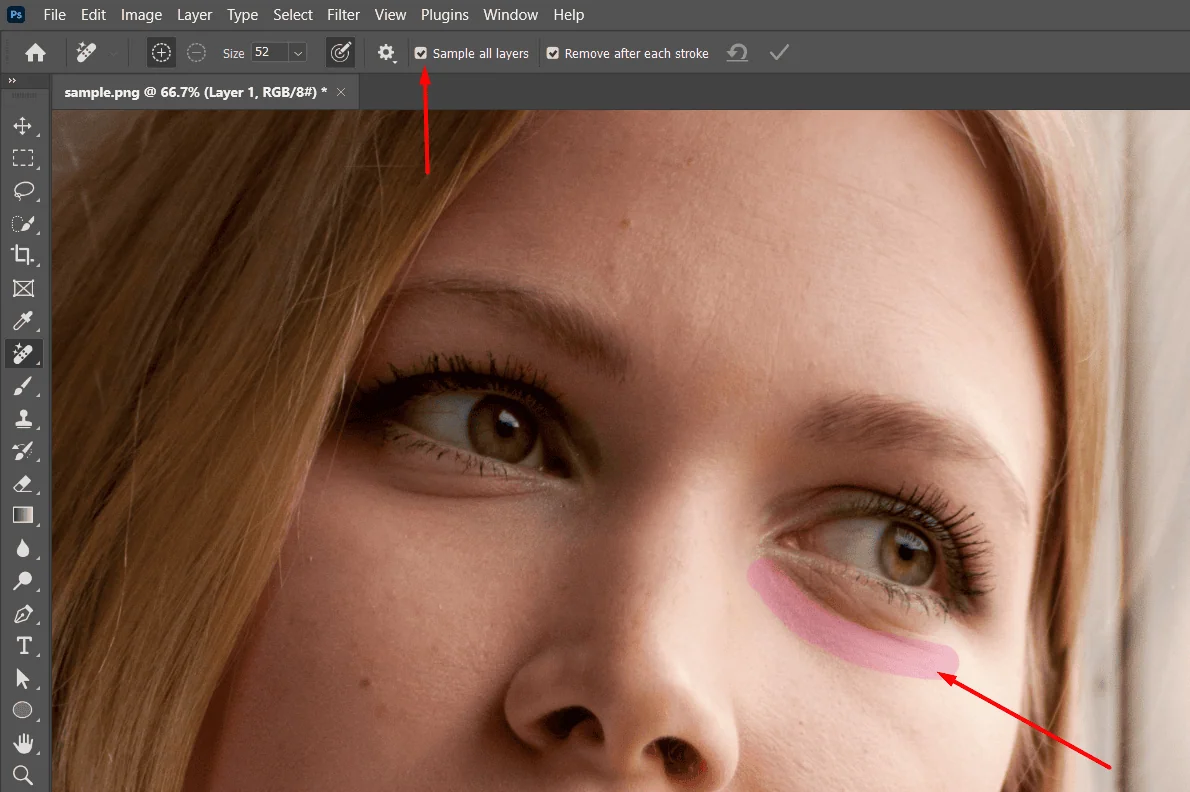
2. Select the Remove Tool – Choose the Remove Tool from the toolbar.
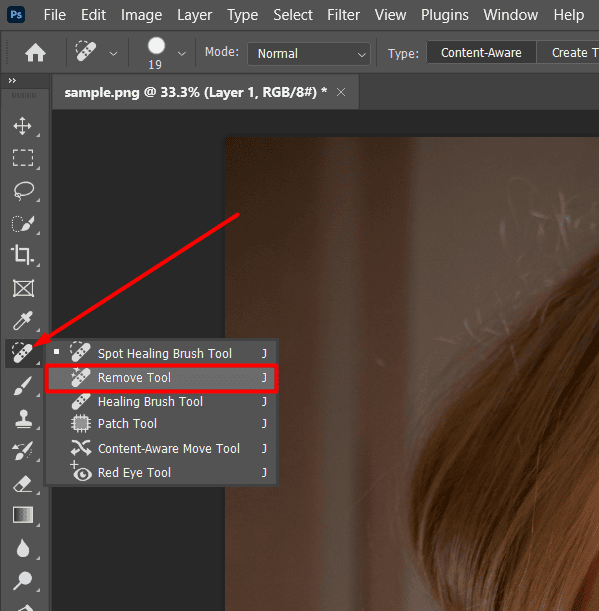
3. Paint Over Uneven Areas – When using the Remove Tool carefully brush, over the skin areas that require smoothing. Make sure to tick the box for “Sample All Layers” to get outcomes.
4. Check for Consistency – Take a step back. Inspect for any spots that still look uneven. If necessary keep painting over those areas until you get a finish.

With the help of the Remove Tool, for adjustments and Dodging and Burning for substantial edits you can efficiently enhance the quality of retouched images in a short amount of time.
Dodging and Burning techniques have their roots, in darkroom editing methods. Have evolved for modern manipulation purposes. Dodging is employed to brighten areas of an image whereas Burning is utilized to add depth by darkening them. These methods play a role in improving images, by refining highlights sculpting features and intensifying shadows on the skin.

The third method merges the effectiveness of separation, with the accuracy of the Remove Tool –
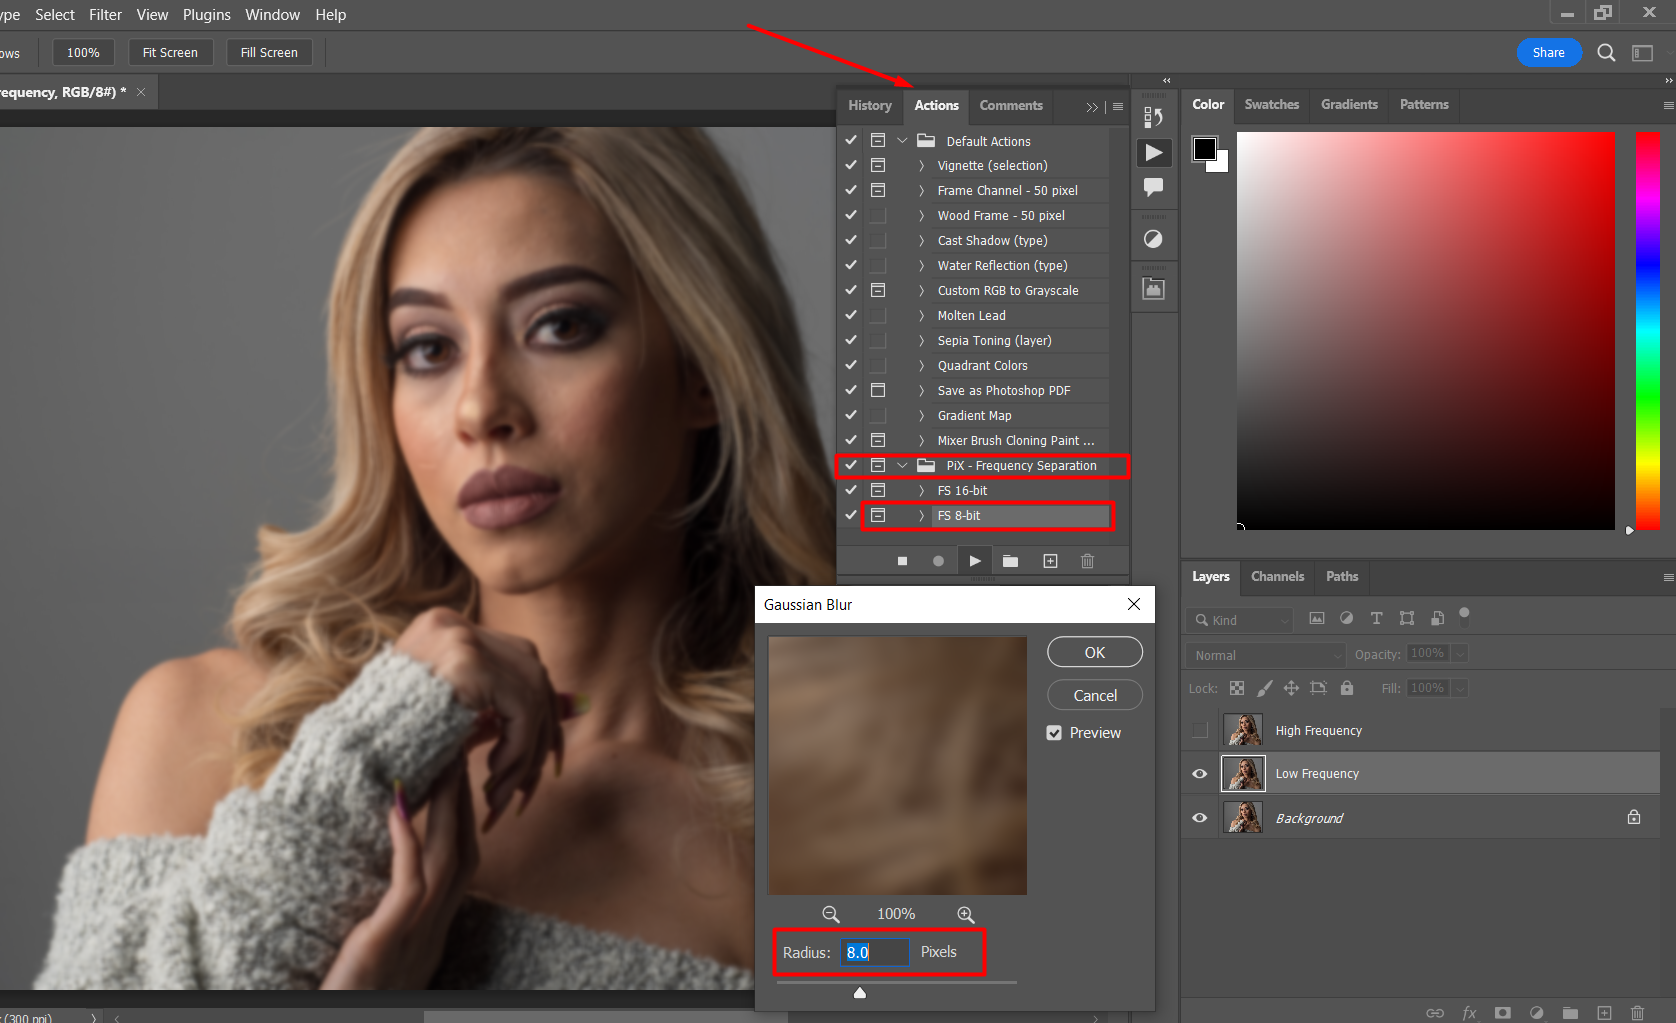
1. Apply Frequency Separation – Begin by using frequency separation on your image to separate the texture from the color and tone layers.
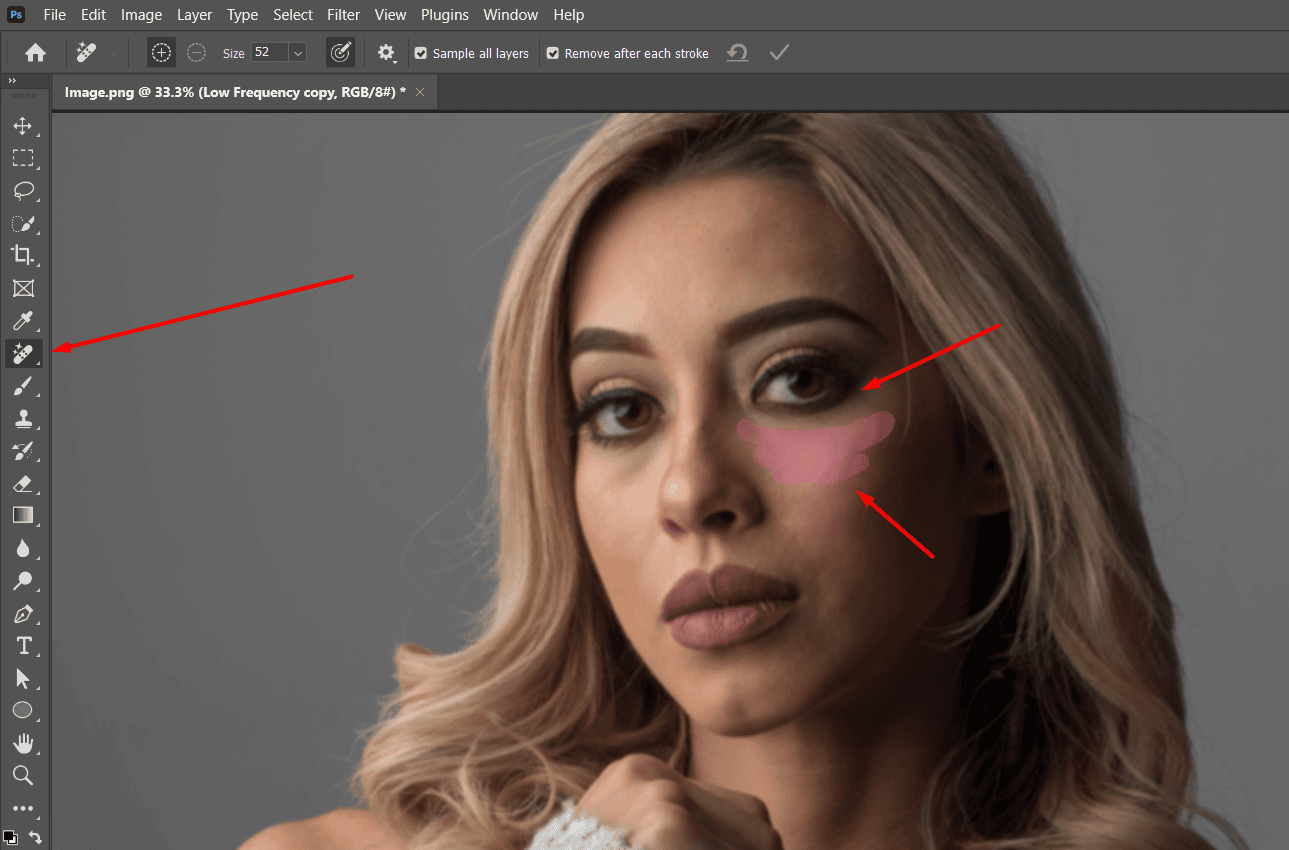
2. Remove Unevenness – Lets use the Remove Tool to smooth out any imperfections, in the layers like, under eye bags or uneven skin texture.

3. Fine-Tune as Needed – Zoom out and make adjustments until you achieve a polished and effortless appearance.

This method is effective, in improving the skins quality and look without compromising its texture and appearance.
Here are three techniques that offer ways to improve skin in Photoshop. Whether you prefer the precision of tools such, as the Remove Tool and Dodging/Burning or the ease of plugins like Retouch there’s a method that aligns with your workflow. Experiment, with these methods to find what works best for your projects and enjoy creating portraits with ease.